使用 IIS 部署 nextjs 前端项目 + python 后端项目
背景:
项目需要使用 nextjs 作为前端框架,python 作为后端框架;
前端和后端分离部署,前端部署在 IIS 上,后端部署在 python 环境下;
前端部署在 Windows Server 上, 后端部署在 Linux 服务器上;
Linux 服务器和 Windows Server 服务器之间内网互通。
端口白名单只开放前端的端口号对外访问。
1. 部署 nextjs 前端项目
安装 cross-env
yarn add -D cross-env设置 package.json 文件
{
  "scripts": {
    "dev": "next dev",
    "build": "cross-env NEXT_PUBLIC_API_URL=[http://ip:port] next build",
    "start": "next start"
  }
}
设置 next.config.js 文件
/** @type {import('next').NextConfig} */
const nextConfig = {
  /* config options here */
  output: 'export',
  distDir: 'out',
};
export default nextConfig;
运行 yarn build 即可在目录的 out 文件夹下生成静态文件
yarn build拷贝 out 文件夹下的文件到 IIS 的网站目录下即可
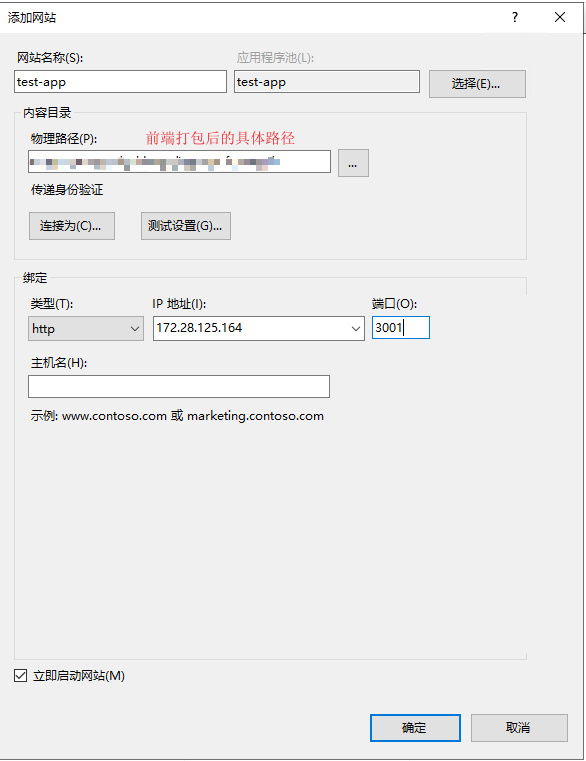
注意:[http://ip:port] 替换为前端服务的地址 比如 Windows 服务器的公网 ip 是 101.43.xxx.xxx, 端口号是 3000, 则 NEXT_PUBLIC_API_URL=http://101.43.xxx.xxx:3000
2. 部署 python 后端项目
后端 python 项目使用 docker 部署,这里不做详细说明。 后端的服务端口号为 3001
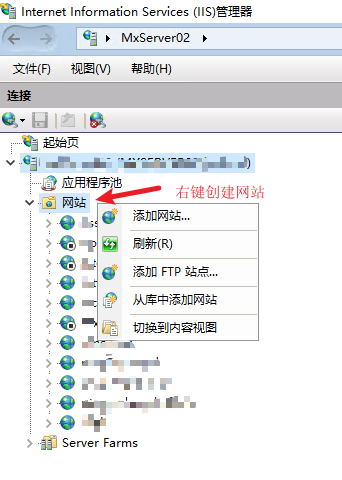
3. 部署前端项目到 IIS
打开 iis 管理器 创建一个网站
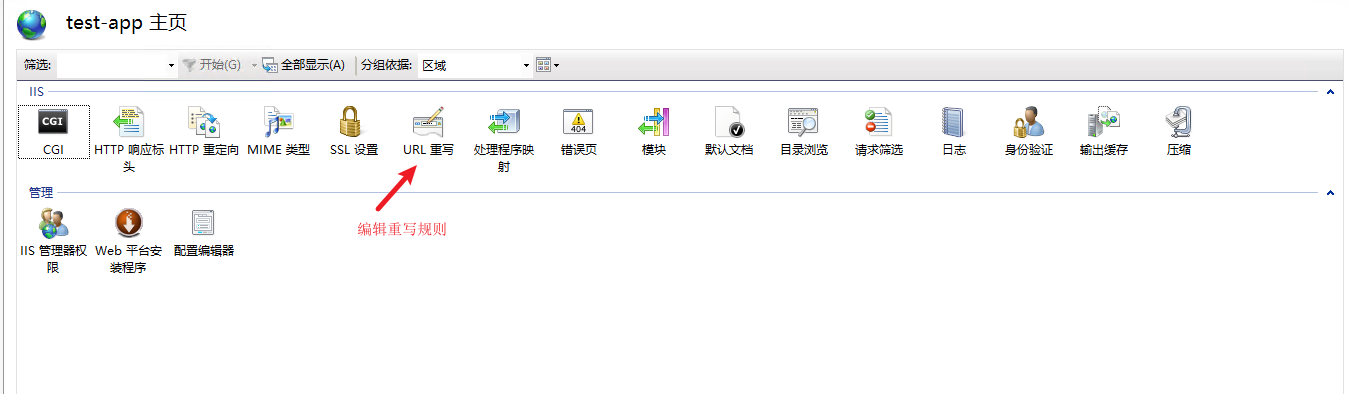
编辑 URL 重写规则
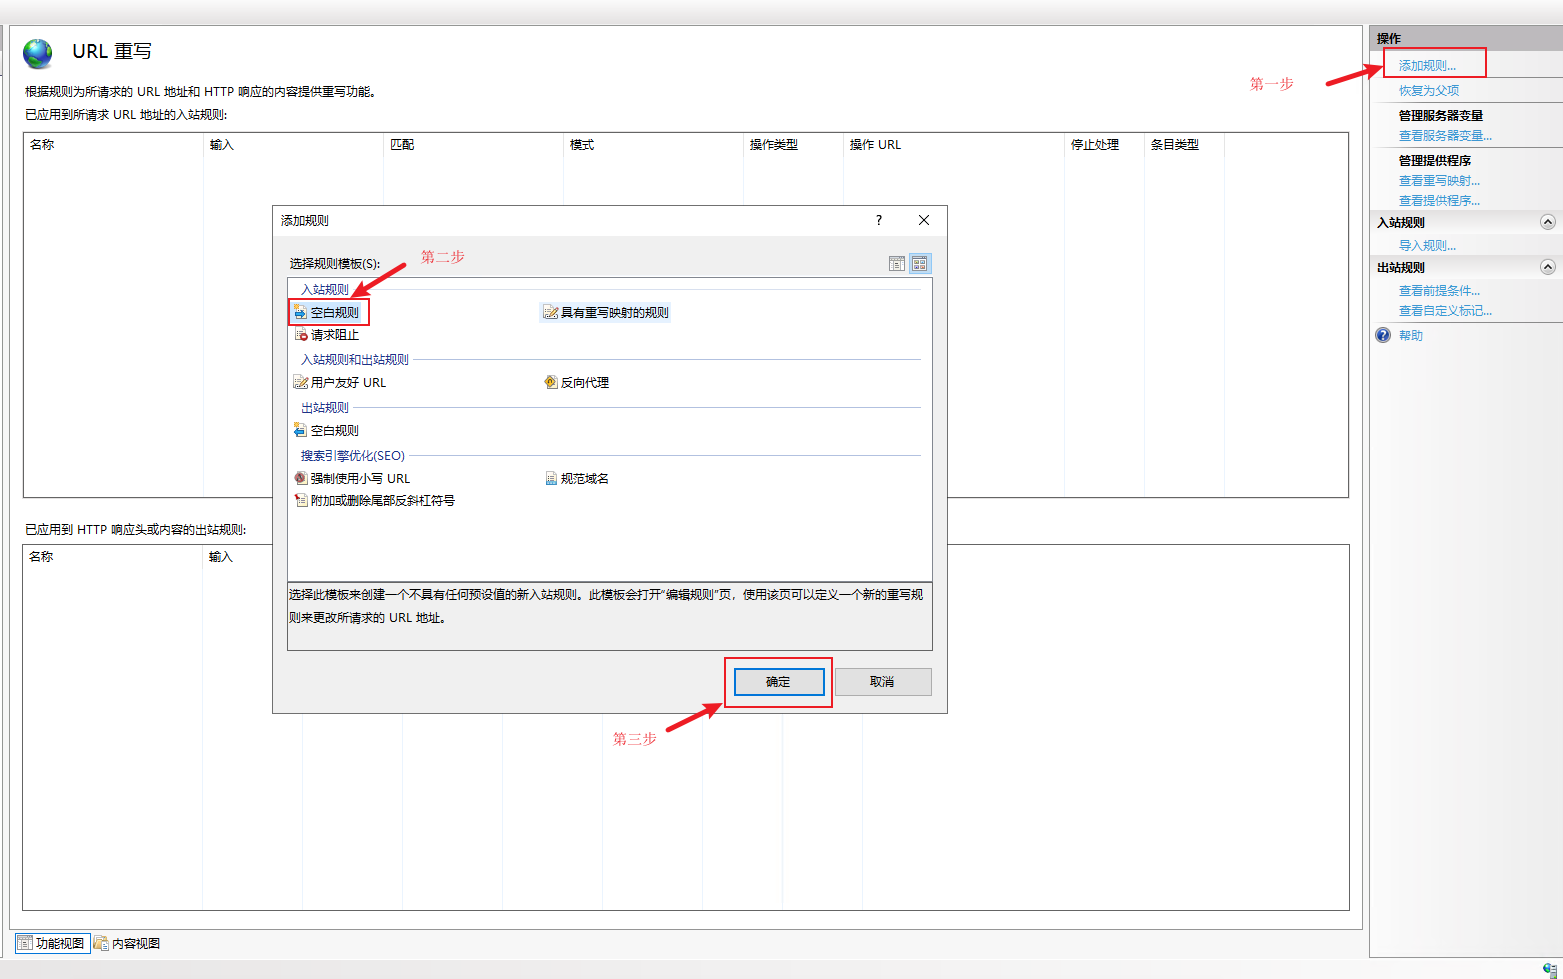
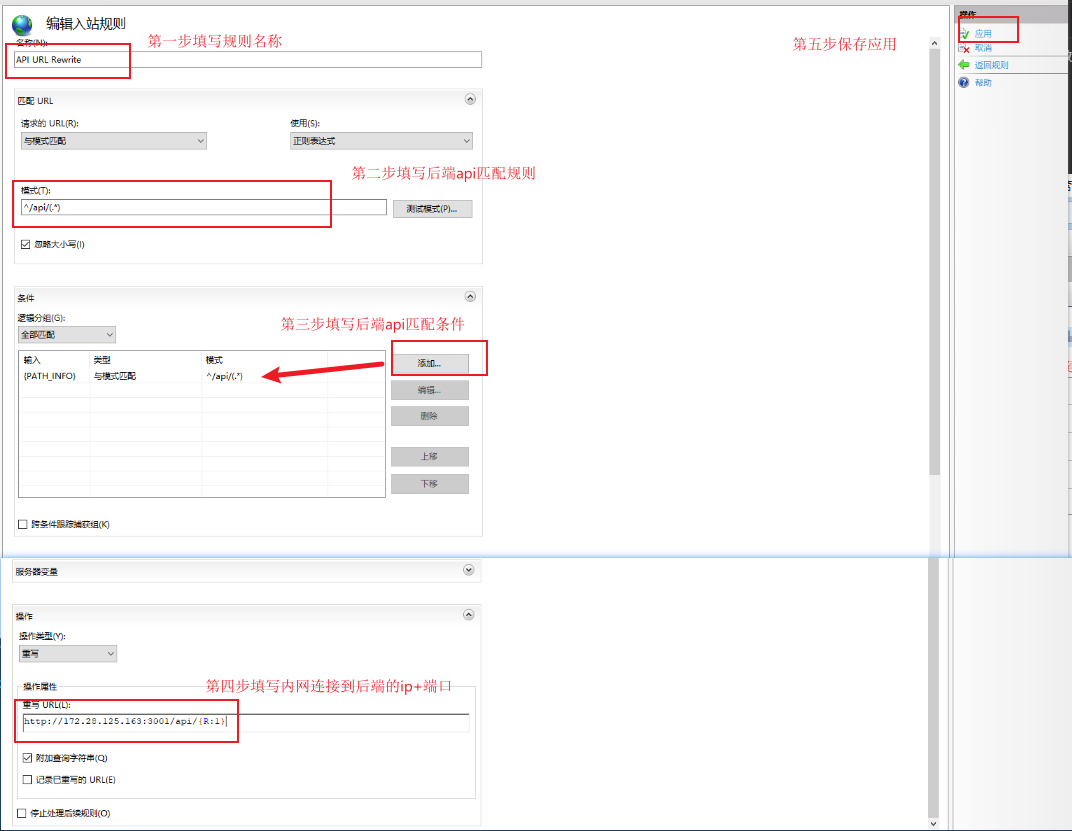
保存后可以看到一个 web.config 文件在前端项目的根目录下生成

就此项目部署完成,访问前端项目的地址即可访问到前端项目。
4. 自动发布应用到 IIS 网站目录下
使用 scp 命令 + post-install 脚本实现自动发布应用到 IIS 网站目录下
创建一个 web.config 文件
<?xml version="1.0" encoding="UTF-8"?>
<configuration>
  <system.webServer>
      <rewrite>
          <rules>
              <rule name="API url rewrite">
                  <match url="^api/(.*)" />
                  <conditions>
                      <add input="{PATH_INFO}" pattern="^/api/(.*)" />
                  </conditions>
                  <action type="Rewrite" url="http://172.28.125.163:9001/api/{R:1}" />
              </rule>
          </rules>
      </rewrite>
  </system.webServer>
</configuration>
新建 addConfigFile.js
'use strict';
const fs = require('fs');
const path = require('path');
const outputDir = path.join(\_\_dirname, 'out');
fs.copyFileSync(path.join(\_\_dirname, 'web.config'), path.join(outputDir, 'web.config'));
创建一个 deploy.js 文件
'use strict';
const { exec } = require('child_process');
const path = require('path');
const outputDir = path.join(__dirname, 'out');

// 构造 SCP 命令
const scpCommand = `scp -r ${outputDir}/* ftpuser@xxx.xxx.xxx.xxx:\\E:\\app\\assets-dashboard\\assets-frontend\\`;

// 执行 SCP 命令
exec(scpCommand, (error, stdout, stderr) => {
  if (error) {
    console.error(`执行错误: ${error.message}`);
    return;
  }
  if (stderr) {
    console.error(`错误输出: ${stderr}`);
    return;
  }
  console.log(`标准输出: ${stdout.length === 0 ? '发布成功' : stdout}`);
});
修改 package.json 文件
{
  "scripts": {
    "dev": "next dev",
    "build": "cross-env NEXT_PUBLIC_API_URL=[http://ip:port] next build",
    "postbuild": "node addConfigFile.js && node deploy.js",
    "start": "next start"
  }
}
运行 yarn build 即可自动发布应用到 IIS 网站目录下
yarn build根据提示输入 ftpuser 对应的密码